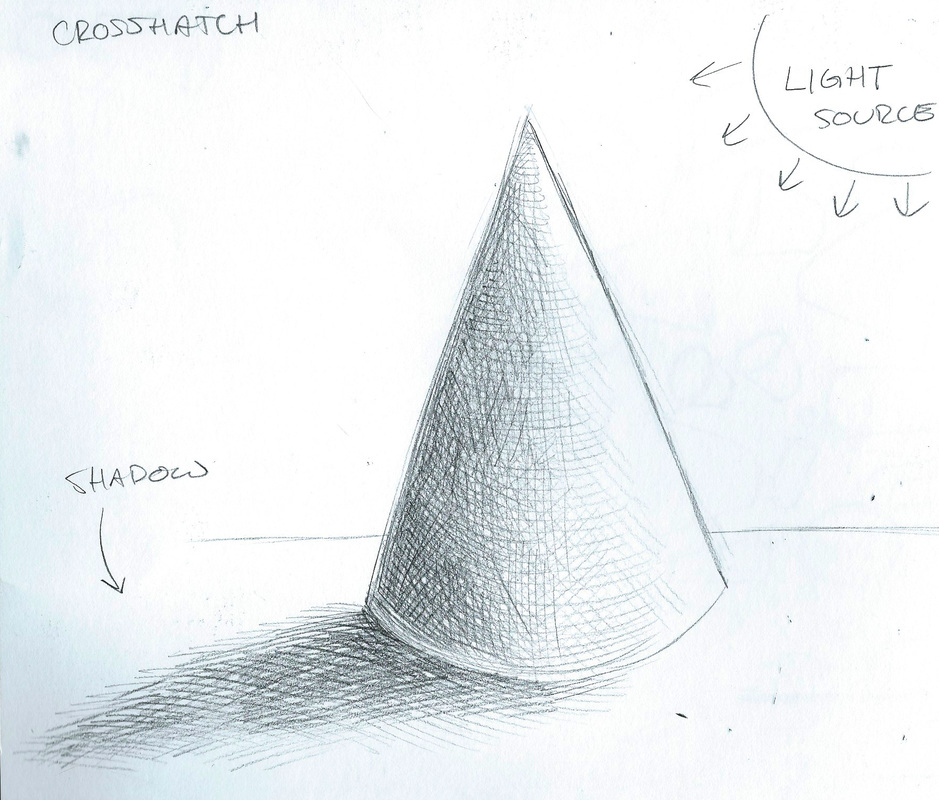
 Crosshatch is the idea of creating shading using lines that are parallel to each other. By moving the angle of the lines, you start overlapping lines to create value. These lines are not dark and you do not push the lines harshly into your paper. Instead, lightly build up your lines and your values. Artists start light and slowly add their shadows when they shade, so we will practice this concept again in this assignment. We are going to crosshatch a cone.Remember, never create a flat bottom, it has to be curved and the two lines should be parallel to each other. Get a ruler to make a perfect cone. Then, figure out is what direction the light source is coming from. (left or right). Once you know that, slowly start cross hatching the shadows. Make sure that the lines are close to each other and not far apart. If they are far apart, the crosshatch will not give the shading effect you want. Make sure your lines are light and once you have your light shading down, slowly add layers of lines to gradient it from light grey to dark grey the father away you get from the light source. Add a drop shadow as well using crosshatch . DO NOT: Do not draw dark and there should be no obvious stripes of shading, The values must gradient from light to dark very smoothly. If I see overlap or stripes, you will have to re do the assignment. Points:10 | 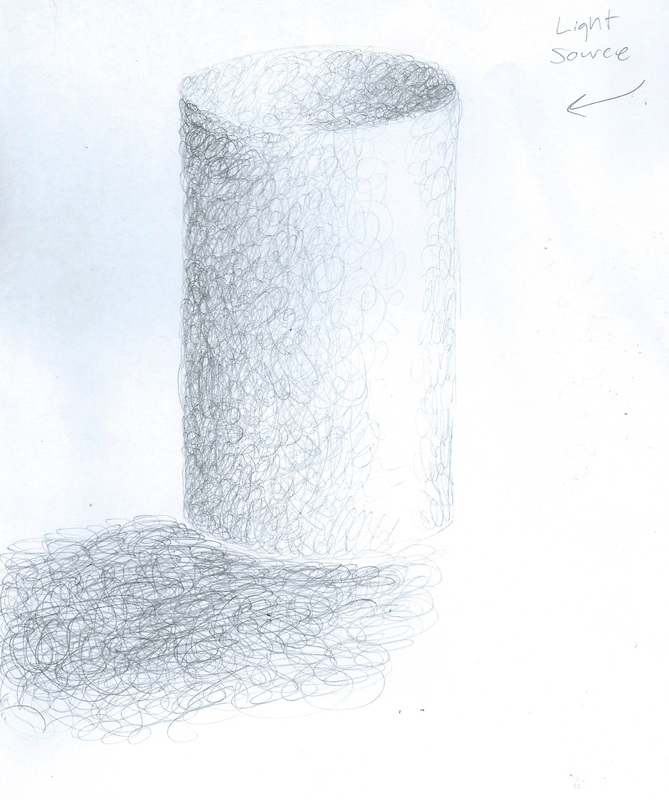 Scribble is shading that uses randomish curved lines to add values. It is a very fast shading technique and like the cross hatch, you will start very light with your marks and get darker after you get the light shading down. You will add layers of circle like marks and there should be an even transition from light to dark. We will crosshatch a cylinder. Make sure the cylinder has a curved bottom and the two lines are parallel to one another. You will use a ruler to create your cylinder. You will need to figure out the direction of your light source so you can know what direction to shade. You will be adding a drop shadow as well. With your shadow, it should be drawn with scribble technique as well. DO NOT: There should be no stripes in your values, so it should all smoothly transition in shading. Do not make really dark marks, start light. Points: 10 |
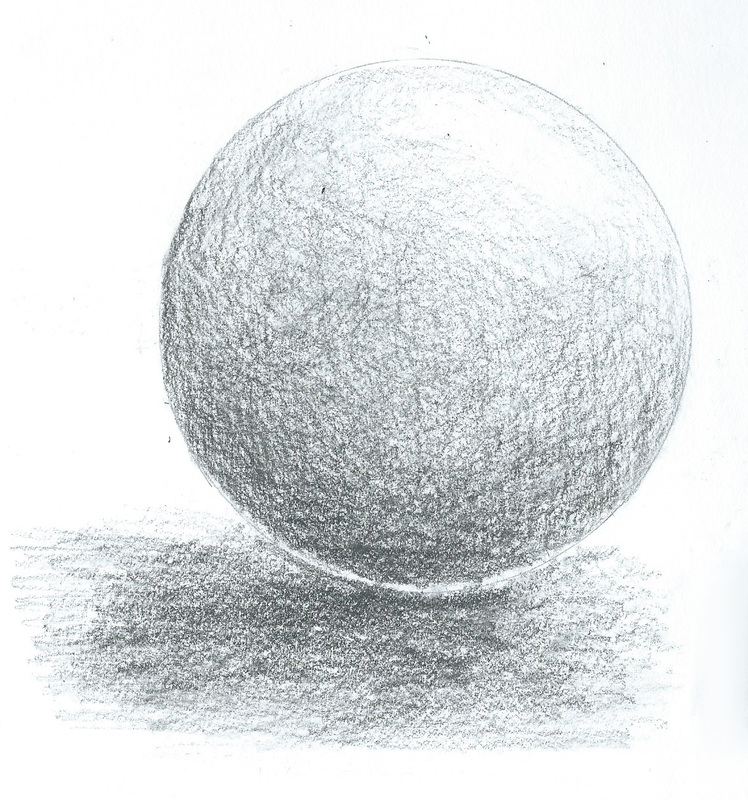 Monday we are going to learn how to correctly draw a shaded sphere. We will be using lids to draw out a stencil for a circle in the middle of our page. Using your 2-B pencil you will very lighting shade inside the sphere in a circle. We will shade around the circle, moving our paper as we go around. You don't want to create horizontal, diagonal, or vertical strokes when you shade, instead you will slowly go around the circle. When the entire circle is lightly shaded, you will go around it again lightly, added layers of pressure to your page. This will create shadows that is opposite to your light source. A light source is the direction that the light is coming from. The shadows are opposite of the light source. We are going to leave a certain section of the sphere in a light shade where the light source is hitting. Where you shade your shadows, you will leave a strip of light grey for your reflective light. Light bounces off of items that they hit, sometimes creating reflective light near shadows. Reflective light is not a highlight like when light is directly hitting an object, but it is when light indirectly hits on object. You will also add a drop shadow on the ground of the sphere. The drop shadow will be opposite of the sphere.
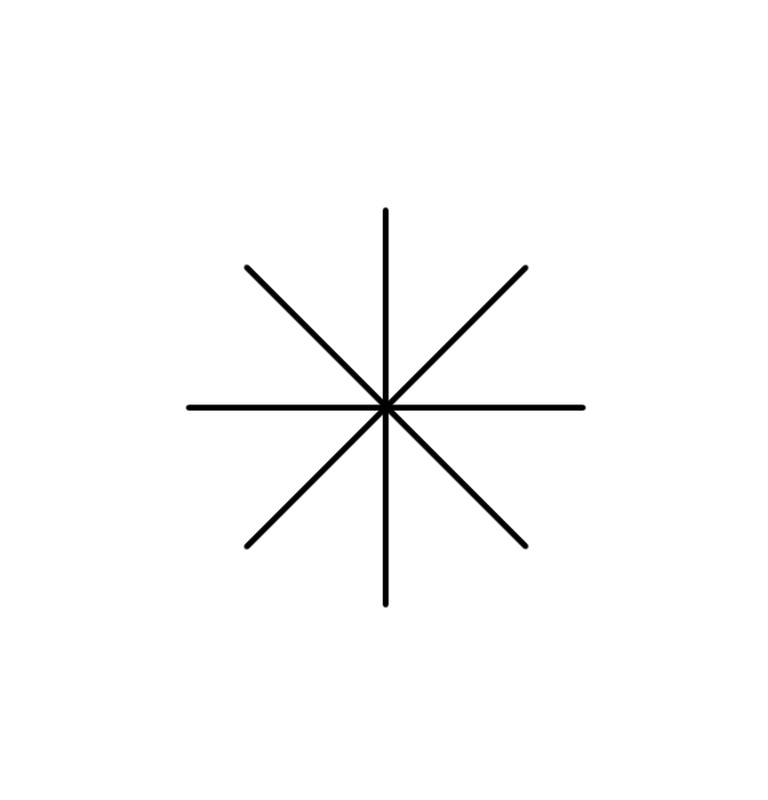
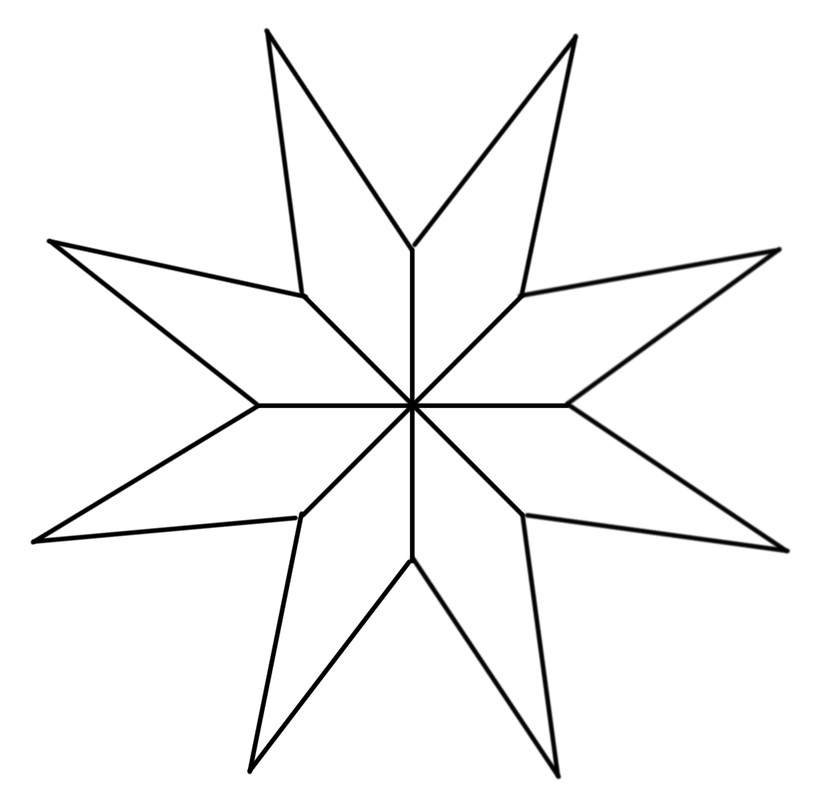
DO NOTS: With the sphere, you have to be clean and take your time. Do not touch your graphite and get used to keeping your fingers off of your drawings. Finger grease can cause smudges to your page which ruins your pictures. It's also bad to shade with your fingers and we are not allowed to do that in class. I know when you use your finger and if you do you will have to restart. Make sure there is not overlap or stripes in the sphere, it all should gradient from one value to the next. I also shouldn't see any pencil marks. The sphere also cannot look like a donut, all the sphere needs to be shaded. This assignment is 10 points. Before you turn it in, you have to get it checked off by me first so I can give you a constructive critique. My critiques help direct you to an A level grade so it's important to listen to them and make corrections if needed. We will have 2-3 days depending on the pace of the class and how much time it takes to get a pass. 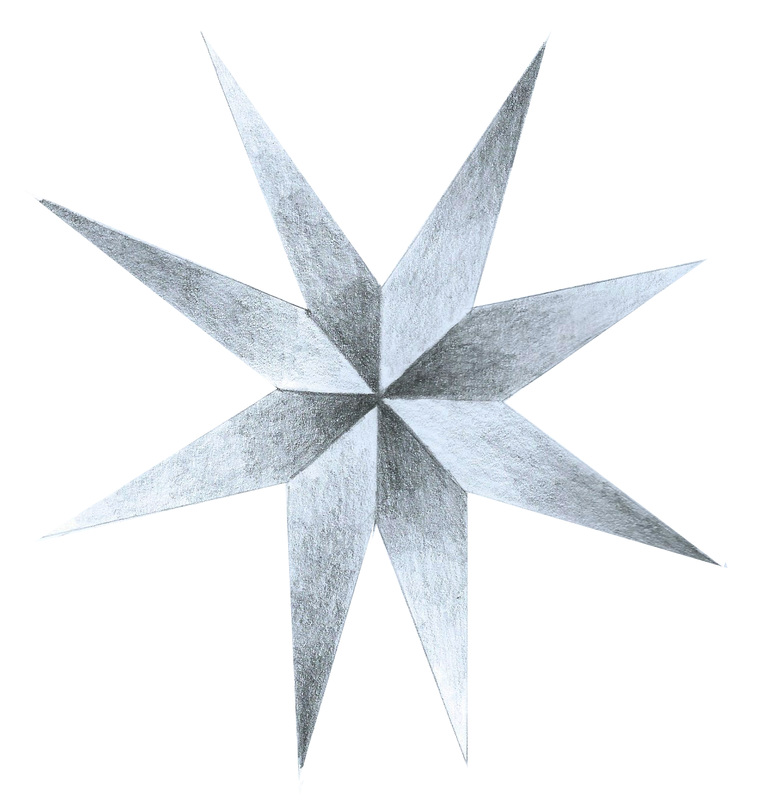 For those that are done with the value scale assignment given yesterday, today we will be doing shaded star. I am going to give a demo on how to create this star in class. You start by making a dot in the middle of your paper. Then, you have a horizontal and vertical line that creates a cross at the dot in your paper. The lines coming out of the center dot should be 1 inch long. Then, you will tilt your paper and repeat the same process, but this time making a X shape. There should be a total of 8 lines that are one inch long coming out of the center. ( see reference below) After that, you will create 3 inch lines coming inwards until they touch. (remember how we did the cone, the two parallel lines touch? Same here, but the shape is more of a star) When you are done doing this you will have 8 different sections. Pick a section and then shade a gradient starting dark inside and going light outside. When you are done, move to the next section right next to it. You will then shade that section opposite, starting dark from the outside and getting lighter nearing the inside. When you are done, you have a shaded star. We will work on it in class. Those that are not done with the value scale will have time to work on that in class also. If you do not finish the star in class, it is due monday! Points: 10 Due Date: Monday
 Starting from this date forward, we will be learning how to shade with 2B drawing pencils. Each and every one of you will receive a 2B drawing pencil from me in class as well as a white eraser cap. All drawings pencils are split up into 2 categories: H and B. H pencil are very hard pencils, but when you draw with them, the lead is very light. B pencils have very soft lead and shade very dark. The higher the number of B, the darker the pencil (the darkest is 8). We will be using a 2B, which is dark, but not too dark. It is good for beginners. When I hand this to you it's yours. I will not give you another one and it's up to you to not lose it. If you do, you can drive to an art store and buy a new one yourself. You are not allowed to use the electronic sharpener for 2B pencils, since they are so soft. It's best to use a small pencil sharpener.
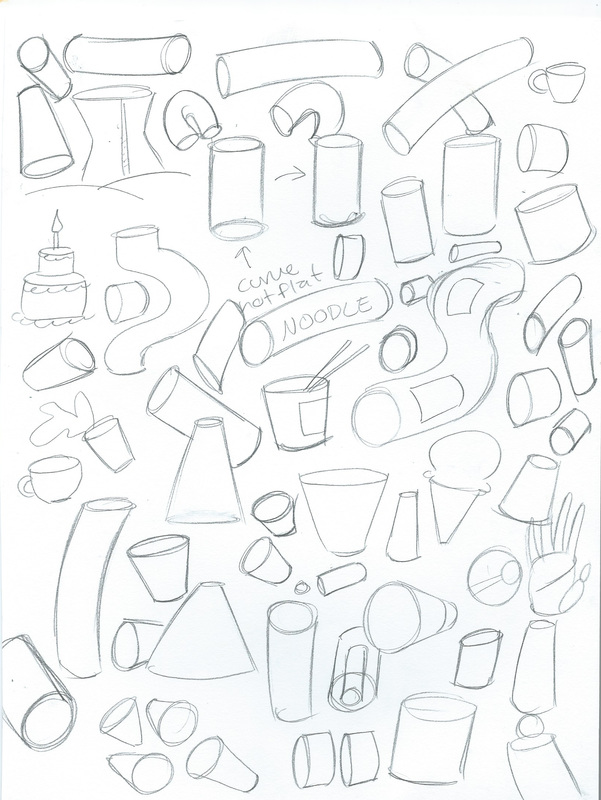
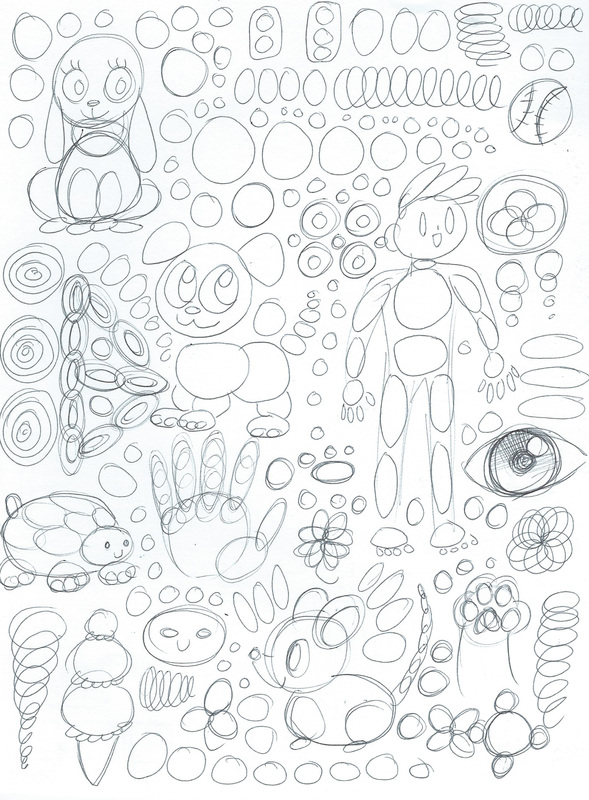
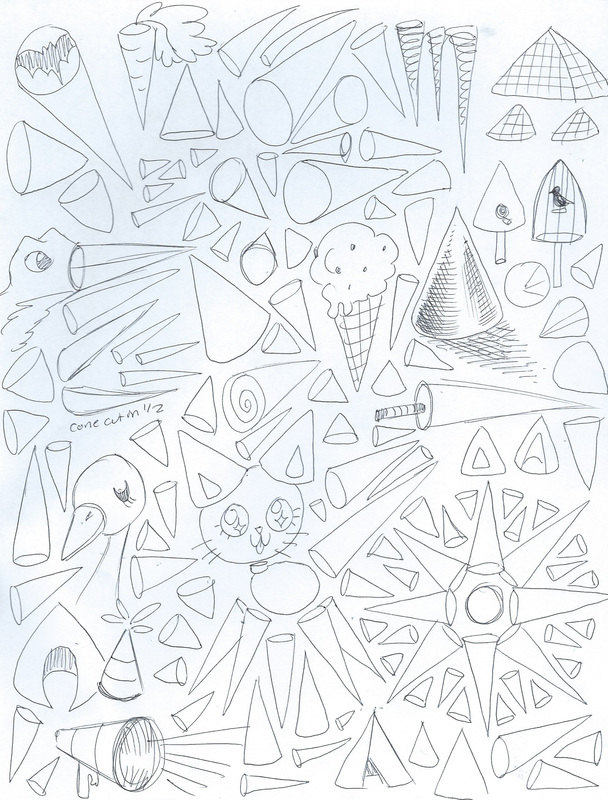
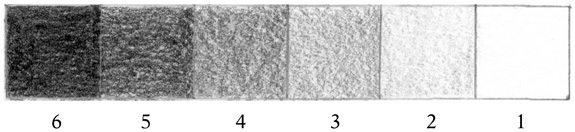
We will start with the basics of shading, the value scale! Value is an element of art for the spectrum of light and dark. You will receive a value scale and you will have to gradually shade it in darker and darker for each square so it looks like a gradient transition of value. The entire square has to be shaded in and there should be no white spots or overlapping. To do this, you have to take your time and shade using the side of your pencil. To shade, you start very light and slowly add pressure to get the shade you want. If you go to dark, you cannot erase and undo it, so it's best to start off light and build your darks. This assignment is a PASS or FAIL grade. You will have to check it off with me in order to pass. You will not turn these into the turn in box. Most of you will have to do this assignment twice, so don't get upset if I tell you to redo it. This is great shading practice and you will need all you can get before we start shading objects. Points 10 Due: Monday 28th Tuesday and Wednesday we are learning how to draw basic shapes. Shapes make up the entire world around us. You can break any object or creation that ever existed into basic shapes. They are the building blocks of art! Before we learn how to draw awesome things, we first need to know how to freehand good looking shapes without a ruler. We are going to fill up entire pages of: Circles, Squares, Cones, and Cylinders. Have fun and try to make things up only using certain shapes! 5 points for each page This grade will be a checkoff grade, due Friday.
Today we are all working on the lineadoodle. We will only have one day in class to work on this, it is due Tuesday. If you do not get it done, you will have to take it home as homework. The assignment is on the post below for lineadoodle. Also, make sure you have your pattern project all turned in.
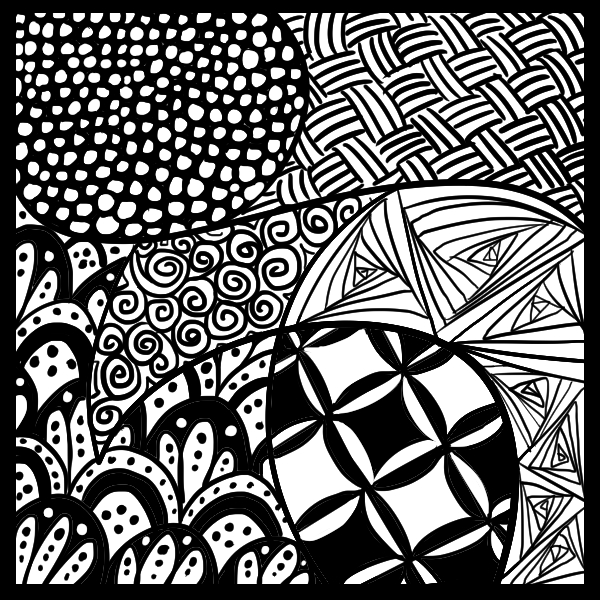
If you finish the pattern project early, you will be working on a new assignment called Lineadoodle. Lineadoodle is an assignment where you fill an entire page with continuous lines! 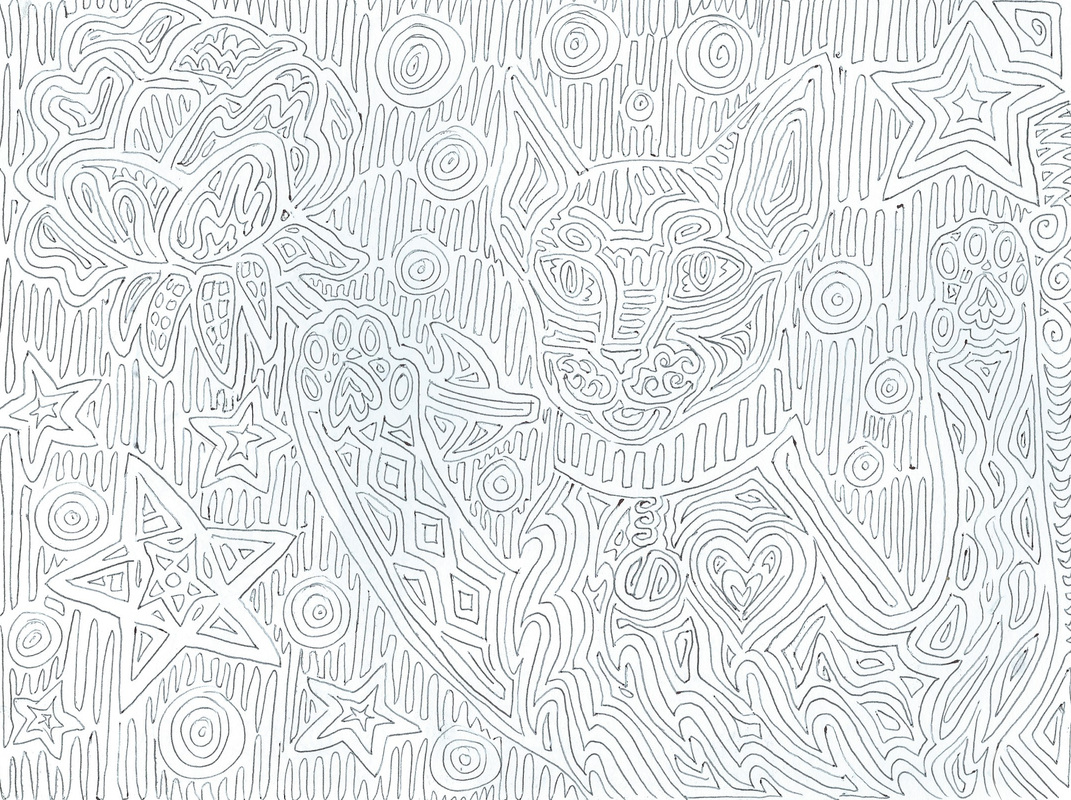 Here is a good example of the lineadoodle, a page made with continuous lines! All the lines are even thickness between each other. Do not make them too large of space between one another and do not make them so close together they touch. Make sure that no lines cross, our your illusion is ruined.
You will draw out one Cat, one Plant, and one Symbol (a symbol can be a letter, number, logo, star, heart, etc) and then you will fill the cat, plant and symbol with lines. Differ the types of lines you create, sometimes having a few jagged lines or clean swirl lines can make the image look cool. There should be no white space. Please, take your time with this assignment, because it can be very easy to accidentally cross lines or mess up your line thickness. Points: 10 I hope you all got your patterns finished that we did this week! After I introduce the new project, I will come around and check them off in the gradebook! Remember they are 5 points a pop, so make sure you have them in your folder finished! What we are going to do this week is a Pattern Project! This assignment will help me assess how much you learned the previous week about patterns. You will be able to use your patterns for this project, since you will not be turning them in. For the pattern project, you will be creating a asymmetrical (means that it looks different from every angle) composition (layout) of at least 6 SPACES. (you can have more). In each of these spaces, you will fill with a different pattern. You must plan out your composition on a rough draft piece of paper and have an idea for what patterns go in the spaces before you get your final paper. You will only get 1 final draft paper. If you mess up, I will not give you another one since the paper is expensive. That is why it is good to have an idea first so you don't mess up. When you get your final draft, you will sketch out your patterns. After, you will BORROW a fine tip sharpie from me, We only have so many of these so you might have to share. You will be borrowing them for the period, you cannot take them home or steal them. I will write down the names of everyone who is borrowing them in class and I will expect them to be given back so the next art class has materials to use. Sharpies are permanent, so you will need to take your time and work slowly. When you are done, return the materials, put your name and period number on the back, and turn it into the box. This is a project has a rubric! RUBRIC: -composition is asymmetrical -composition has at least 6 spaces -In each space there is a different pattern -There are no duplicate patterns (2 spaces with the same pattern) -There are NO SMUDGES -Everything is neat -Lines do not cross/ patterns do not overlap with the different patterns. -Sketched out in pencil and lined neatly with sharpie -1/2 inch border -First and Last name on the back, with your period number. Due: September 17th Points: 20
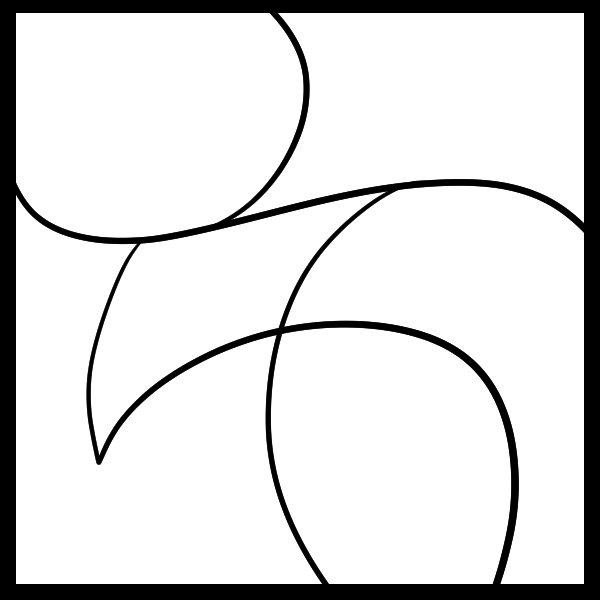
Above is an example of Asymmetry. There are 6 spaces create and it has a more interesting composition. Below is a symmetrical composition and will not be used in this assignment, it is a bad example, doing this composition will result in a 0. 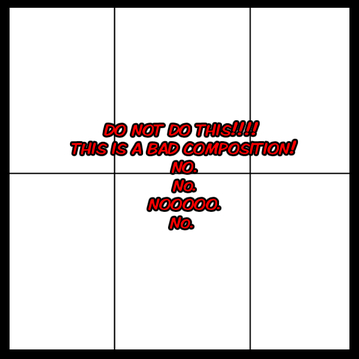 From September 8th through september 12th, we will be doing Zentangles, which are patterns. I will be introducing a powerpoint about patterns to start this unit! Sadly, this powerpoint file is too big to add to this website, but it is okay because it is mainly images! After we are done with the introduction, I will be teaching you guys how to draw certain patterns on the overhead. We will try to do 4 each day. Each pattern will be 5 points. Instead of turning them in every period, I want you guys to keep your patterns in your folder. I will be checking them off Friday. You will be needing to keep these patterns for the project we will be doing next week. Below are the patterns we will be drawing. I will add to the list as we do them.   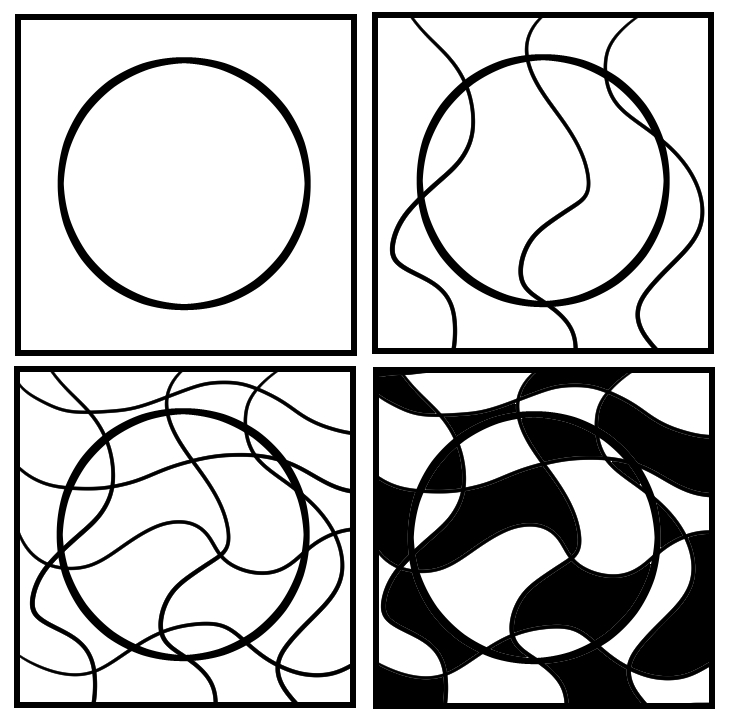 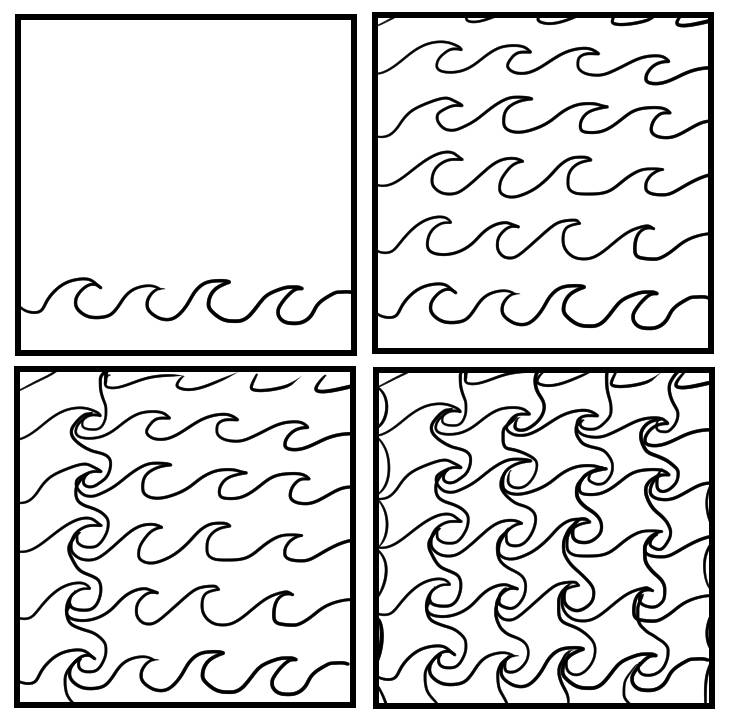 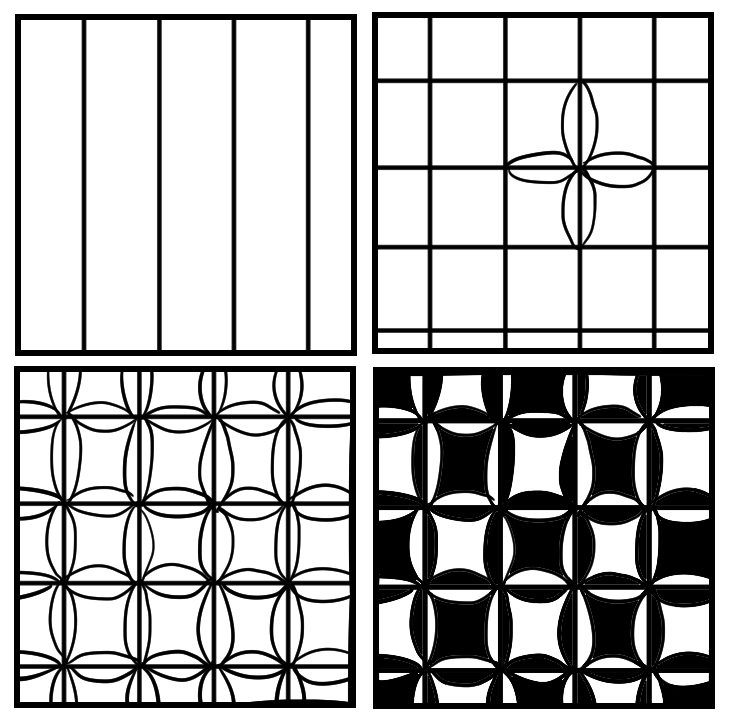 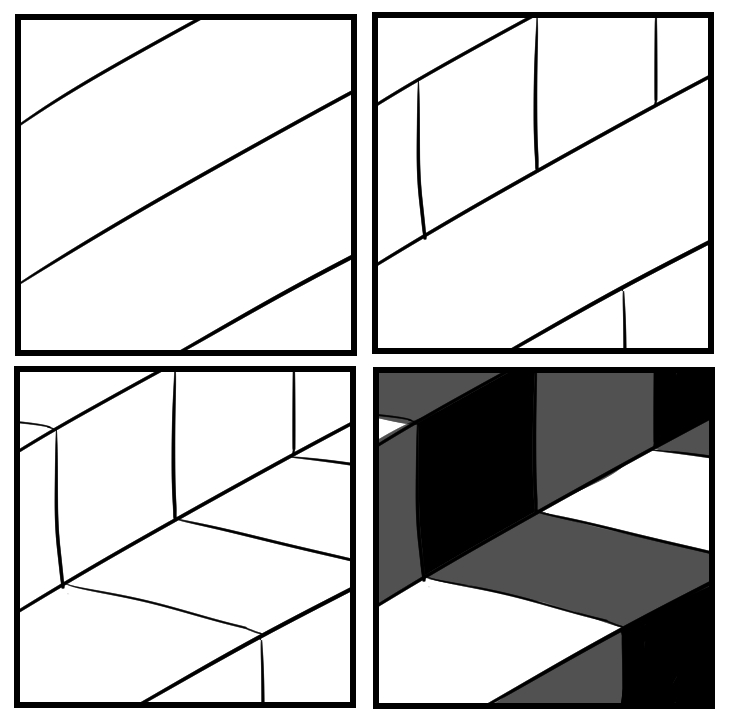 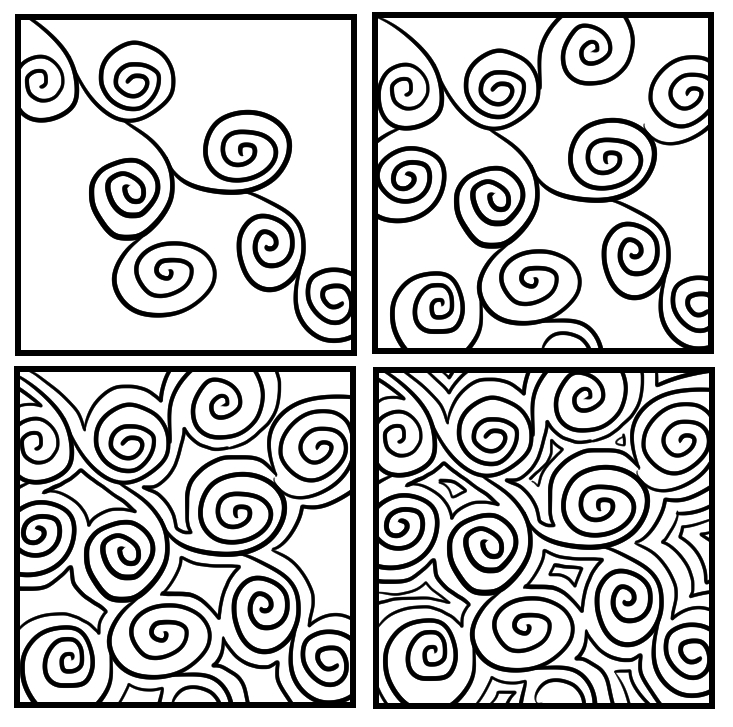 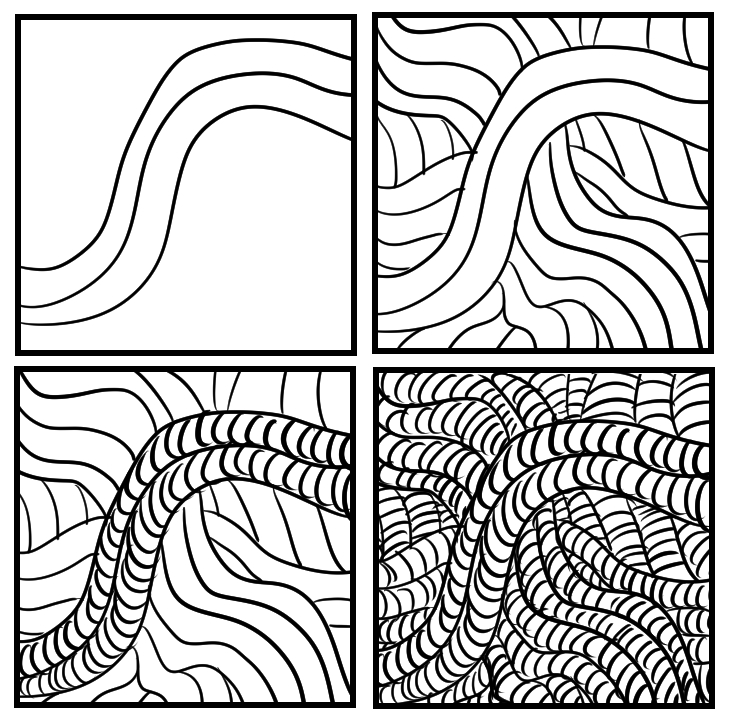 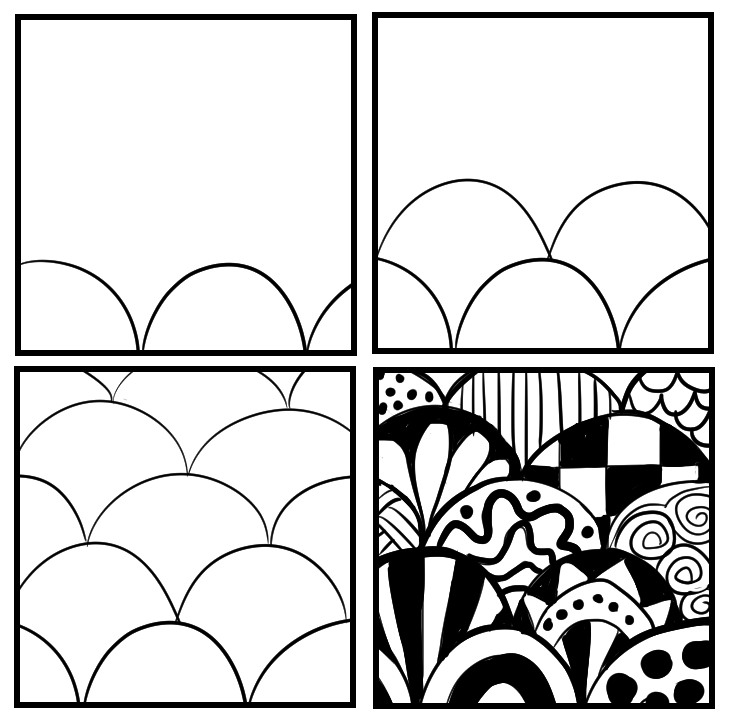 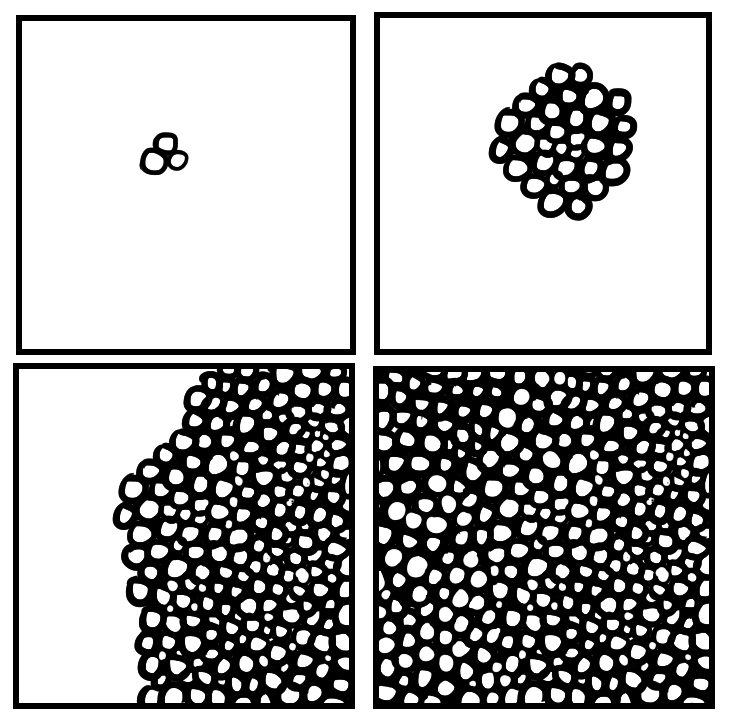 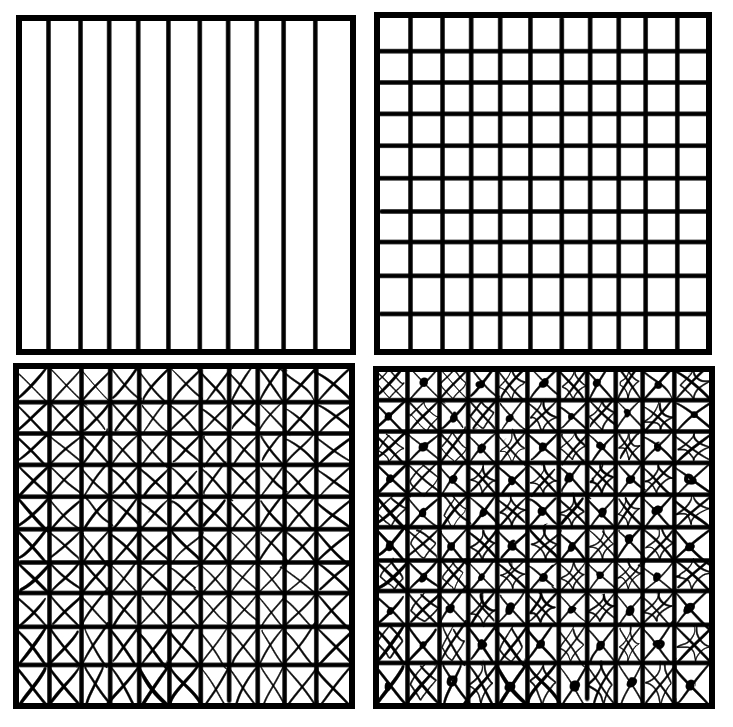 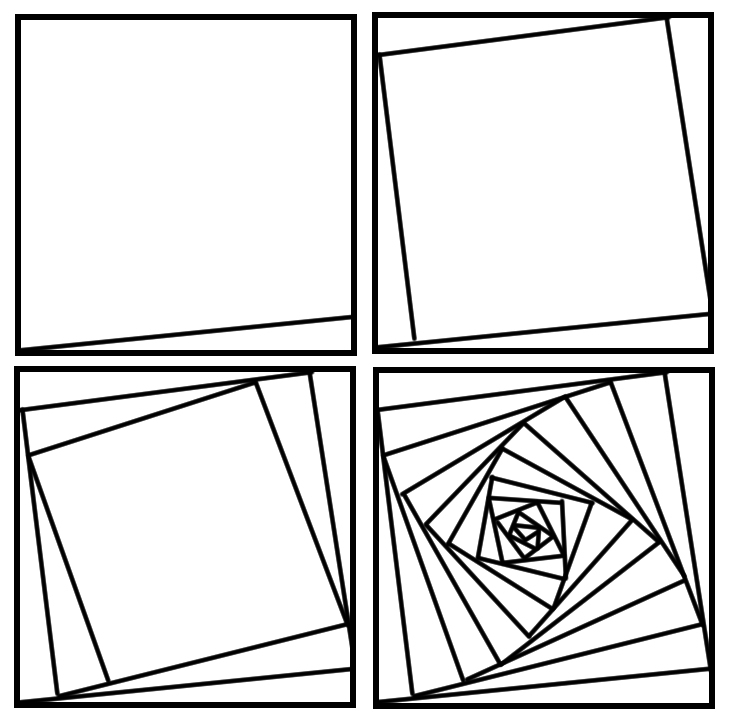  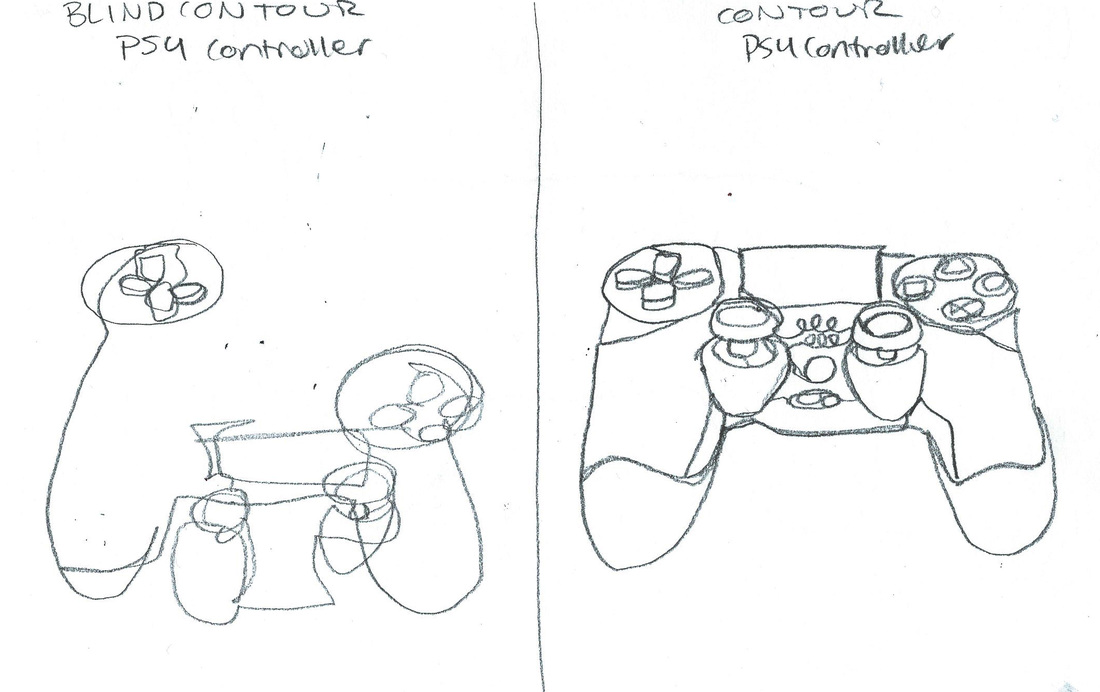 Today we will be focusing on the element of art: Line. A contour means 'outline' and is a special type of line that artists use. A contour drawings is when an artist does not lift their pencil at all when they draw a subject. They only use 1 line. It gives a different look to the drawing.
There are 2 types of contour drawing. A sight contour drawing is when you are able to look at both the subject as well as your paper. A blind contour drawing is when you only look at your subject and not your paper at all to get your hands used to drawing subjects. It is really to not look at the paper, but it is fun to see if you got something similar to your subject when you look. Tips on doing nice contour drawings! -Slowly draw the contour as you eye moves around your subject. There is no need to rush these drawings. Sometimes when you rush you forget to add lines in the middle of the thing you are drawing. Take your time, art is not a race. -Make sure that your contour drawings aren't small and are medium size. They should take up half of the paper. You will be drawing 2 blind contours and 2 sight contours on a piece of paper. The blind contours are on one side of the page and the sight contours are on the other side. Make sure that you put your name and period number. It is due at the end of the period and it is worth 10 points. |