This new quarter will be focused on digital art and drawing using tablets. The tablets that you are going to be using are Wacom tablets. They have nice pressure sensitivity and come with a tablet pen for you to draw with. The tablet and tablet pen are both very expensive. These materials must stay in perfect condition this semester and the pens cannot be lost. Part of you participation grade will be keeping these materials in great condition and not losing them. There is a little band at the end of the tablet where the pen goes. You must place the pen there every day before you leave, you cannot separate the pen and tablet because they can get lost. Before class is over, I will be checking to see if all the tablets and pens are together. This will be part of your participation grade. Using a tablet will be tricky and hard at first, but after lots of practice, using on will be like second nature for you.
To make sure the tablet works, plug it into the usb port. Then, restart your computer so it can re-register the tablet. After that, the tablet should work. You can move your 'mouse' or the arrow on the screen by gently hovering over the tablet. When you touch the pen to the tablet, it clicks, or creates strokes for a drawing. It is difficult at first, but you will get used to it.
This first assignment that we will focus on will be environment art. Environments are essential for any game or movie. They have to be thought out and created so that the characters can be placed in a setting. Environmental artists are valuable in the industry. They spend the majority of their time studying and painting what they see in nature and then transferring those skills into the gaming/movie industries. Environmental artists focus on atmospheric perspective, which is the theory that objects get lighter as they are farther away. They are also experts at color theory (what colors look good next to each other) and textures (how to imply that something looks a certain way, like a tree or a rock). The slideshow above have examples created by professional environmental artists for movies and games. This is just another job that you can acquire through knowledge and expert skill of digital media and tablet use.
For this assignment, we will be trying to draw out and replicate a landscape photo using photoshop brushes. We will be using the paintbrush tool and various brushes that photoshop provides. You will be trying to draw out the image as closely as possible while experimenting with these brushes. Environmental artists will study real life and do these kind of exercises daily.
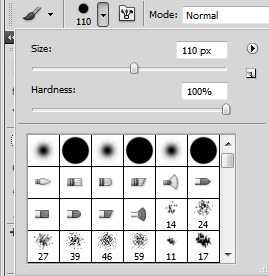 | This is the brush tool. It is located in your toolbar. We are NOT using the pencil tool for this assignment. The brush tool has a variety of optional brushes listed below. We are familiar with the airbursh and the hard brush. There are hundreds of brush options that Photoshop provides and they have different looks to each of them. It's impossible to describe each and every one, so you will have to experiment and try out different brushes to find the ones you like. Make sure that your history is set to 1000, if not, let me know. You might want to go back in case you don't like a brush. |
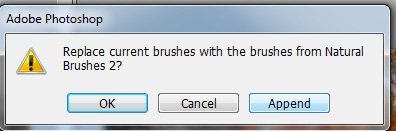
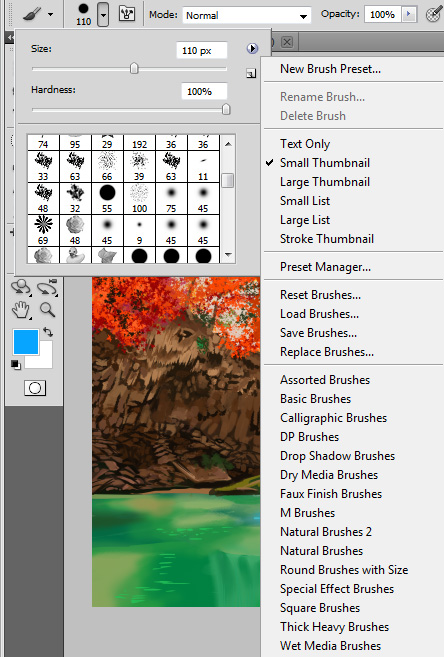 | You might find that you don't have all the brushes that photoshop provides, if so, press the little triangle button that is facing the right. The button is right next to the size option. When you click it, you will get a pop up list. At the bottom of the list, brush bundles are listed. If you click on one you are interested in (like Natural Brushes) a pop up menu will appear. It will ask if you want to replace your current brushes with the bundle you clicked on. Never say yes, but instead, say APPEND. Append will add on the brush bundle without deleting the brushes you currently have. |
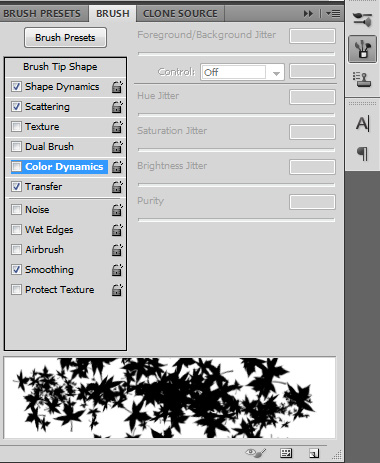 | On the right side of photoshop, you will see a little button with a bunch on brushes on it. This is the Brush Preset button. It will allow you to edit brushes further for specific usage, like shape dynamics and scattering. Don't be afraid to edit brushes to create a brush you like. For this example, I messed with the maple leaf tool. It created leaves, which is what I wanted, but if gave me a bunch of random colors which is what I didn't want. By turning off the color dynamics in the brush presets, I was able to create leaves with the exact colors I wanted. I want you guys to do the same. |
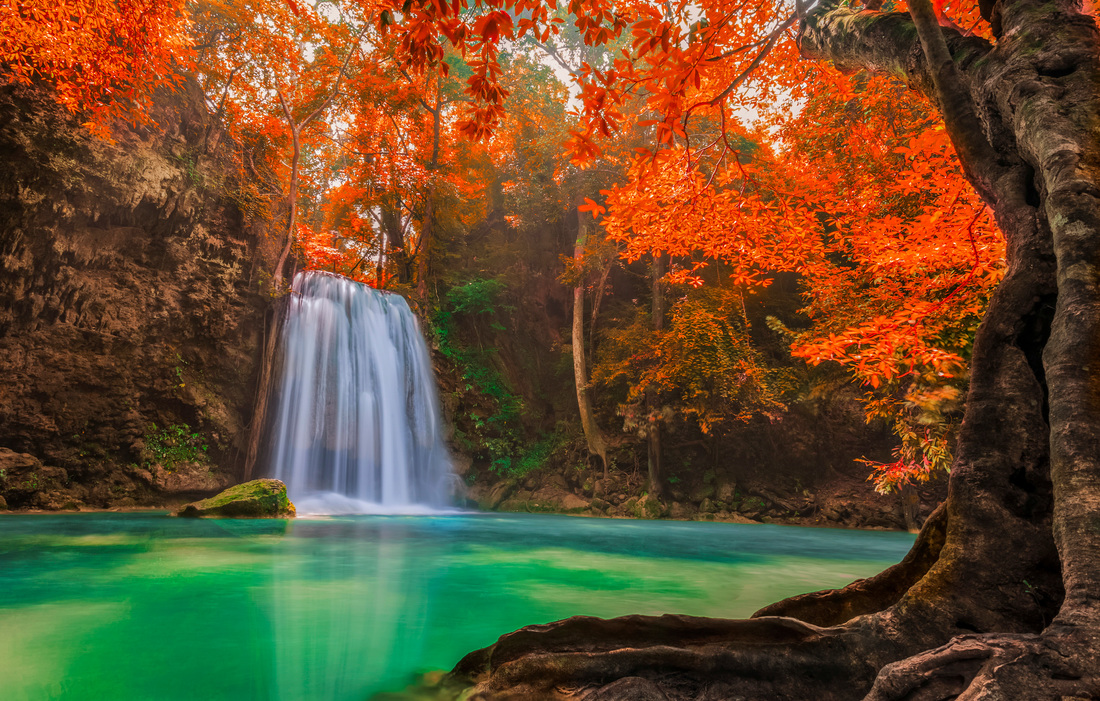
To start an environment study, we need a photo. I will provide you a photo for this assignment. Your environment canvas size will be the same size as the photo you will copy. You will have 2 canvasses open; the photo you are using for the reference and the painting you will be creating. These canvasses will be placed side by side next to each other so you can see both of them at all times. I will show you exactly how you set this up on photoshop on the overhead.
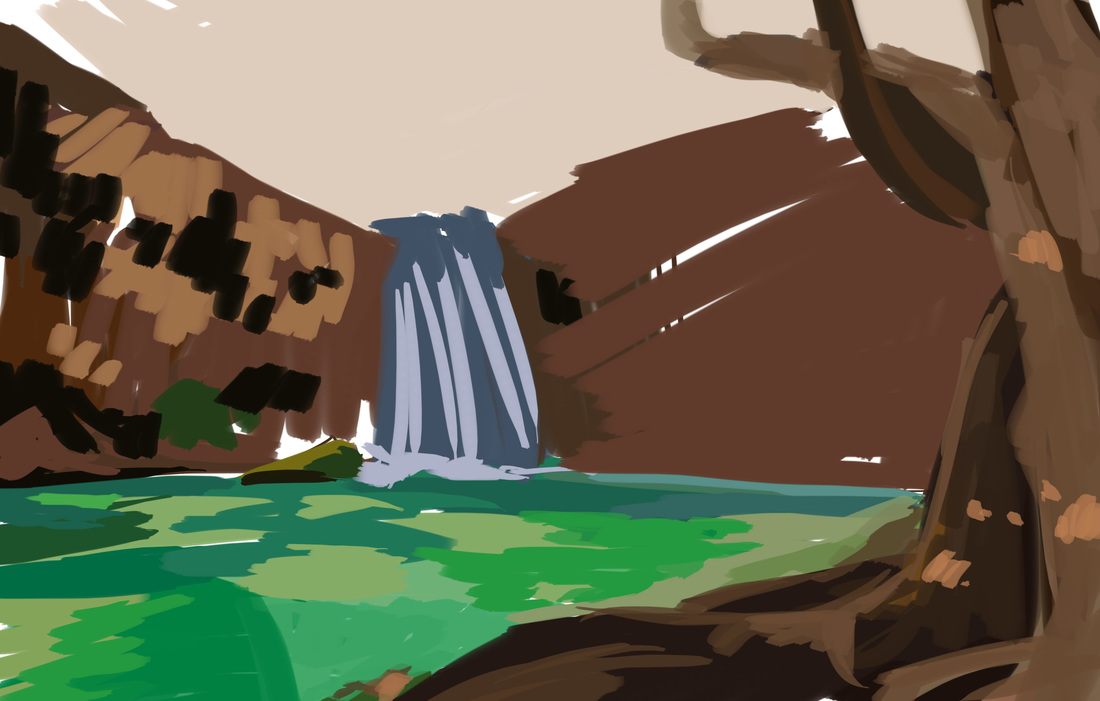
I start this demo by using the eyedropper tool to select colors from my photo. I place them down roughly using a basic brush. I map out the basic elements of the composition onto my canvas. It doesn't look very pretty yet. I continue this until the canvas is filled.
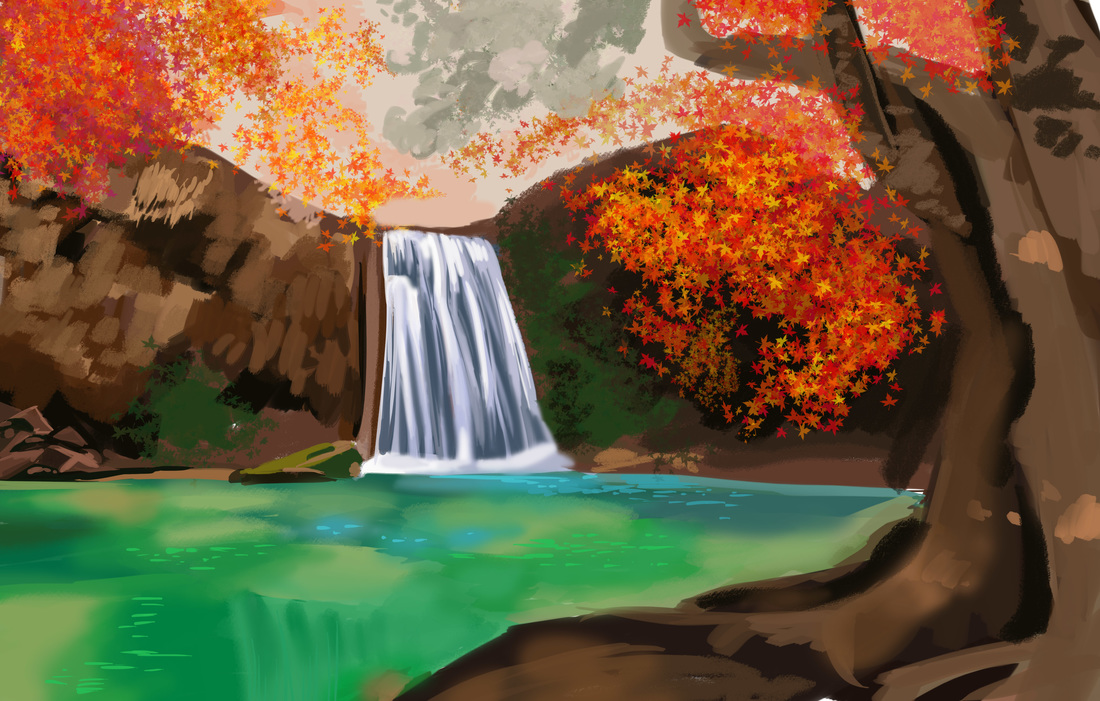
I fill my canvas with colors from the photo. I use the airbrush tool to make my waterfall and water look very smooth. I add in some sharp colors on top of the water to show reflection. I start to add in rocks and bushes. I use the leaf tool to start placing where I want my leaves in my composition.
I add trees and add details to the rocks.
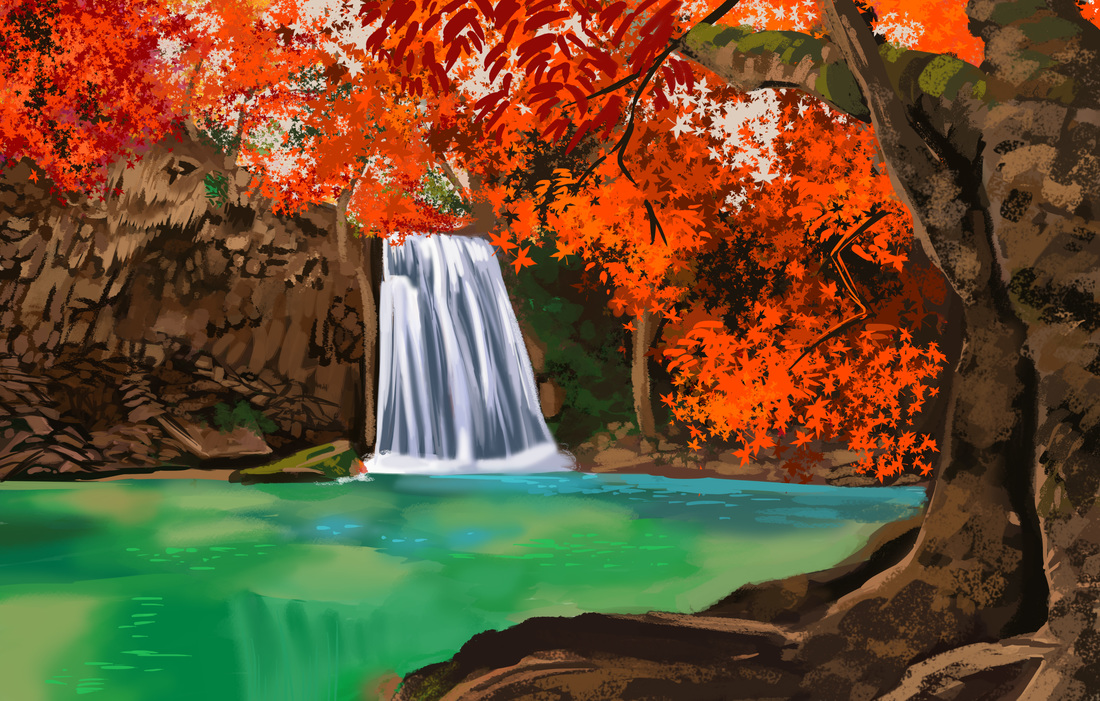
This I change the color dynamics in the brush preset options so that the maple leaf tool will only put down the color I have selected in my color box. I use a chalk tool to created the texture on the tree. I draw in a few leaves myself so that the painting looks less artificial looking. After this, my painting is completed.
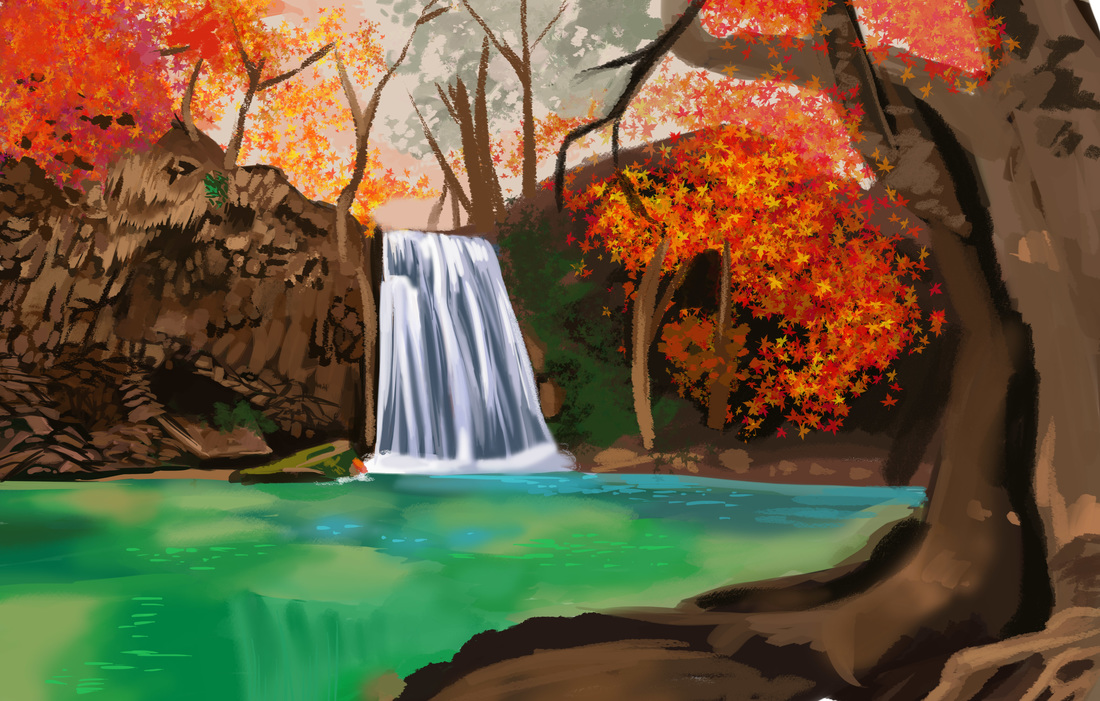
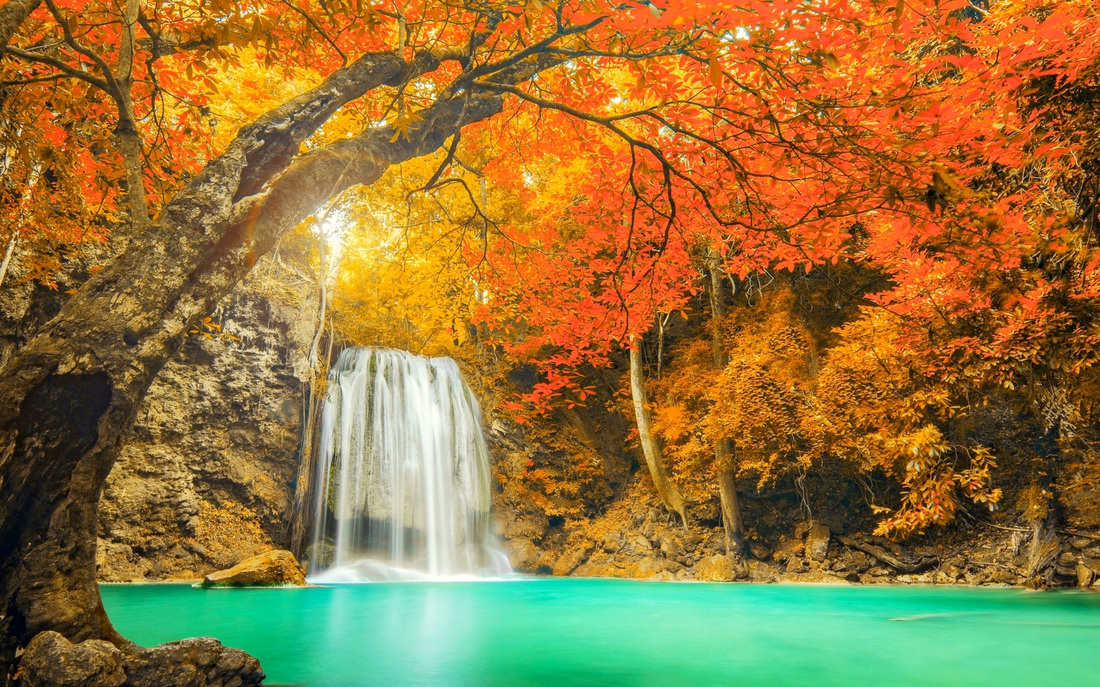
For this assignment, you will not be painting the same image that I painted for my demo. Instead, you will recreate this image. It's actually the same waterfall, but a different photo. Please do not copy the photo I placed below, but instead, click on the link in the button and copy the photo from there. This project is worth 30 points, so please, take your time and try to find the highlights and shading of the image.
For this assignment, you will not be painting the same image that I painted for my demo. Instead, you will recreate this image. It's actually the same waterfall, but a different photo. Please do not copy the photo I placed below, but instead, click on the link in the button and copy the photo from there. This project is worth 30 points, so please, take your time and try to find the highlights and shading of the image.
Points: 30
Final Folder Turn in Date: Feb 16th
Dear New Students,
This website is a blog that I have created. I post all the new assignments and tutorials on this website. All the information is right here. You will be referring to this site on a daily basis. Before you start a project, you are expected to read the requirements for the project. There will be a lot of new information the next couple of weeks, but I will help you and so will your peers. If you never used photoshop before, I advise that you go back in my blog and read the photoshop powerpoint I created for the students. It will help.
 RSS Feed
